How to Stop Phishing Emails in Outlook: Settings and Steps
By Josh C.
The Swiss National Cyber Security Centre received 975,309 phishing reports in 2024 and identified 20,872 actual phishing websites. For an Outlook user, the practical lesson isn't to build an endless blocked-senders list. Learning how to stop phishing emails in Outlook starts with reporting suspicious messages, keeping protective settings intact, and knowing what to do if you've already interacted with one.
Why Phishing Still Reaches Your Outlook Inbox
Kaspersky blocked more than 893 million phishing attempts worldwide in 2024, a 26% increase from 2023, according to its February 2025 announcement. That volume helps explain why an inbox needs more than a single filter.
Outlook can screen known malicious senders, dangerous links, and unsafe attachments. It's harder to distinguish a believable request from ordinary correspondence when someone impersonates a familiar organization or sends mail from a compromised account.
Recognize the request before reacting
- Account suspension alert: A message claims to be from Microsoft and threatens to close your account. Expand the sender details and check whether the address matches the claimed organization.
- Parcel fee request: A supposed courier demands immediate payment to release a delivery. The pressure to act now is a reason to check your order through the courier's app instead.
- Unexpected colleague request: A coworker's real address sends a document or payment request. Hover over the link and compare its destination with the displayed text, then confirm the request separately.
For a useful urgency checklist, F1Group explains how to check urgent emails before clicking. Our guide to detecting phishing also explains the sender and message details worth checking.
Practical rule: A convincing logo or familiar name isn't permission to trust a payment or password request.
Use a repeatable routine: report the message, block persistent addresses, preserve Outlook's protections, and verify sensitive requests through a trusted channel. First, note whether you use Outlook.com, new Outlook, classic Outlook, Mac, or a work account, because the menus and available controls differ.
Report, Block and Safe Senders Compared
Blocking is the weakest fix on its own. Reporting provides feedback that helps improve filtering, while an address block covers only that address. Microsoft's guidance on phishing and suspicious behavior distinguishes reporting from blocking, which must be configured separately.
What each Outlook action does
| Action | Where to find it | Stops this message | Stops future mail from sender | Best use |
|---|---|---|---|---|
| Report phishing | Report, then Report phishing | Yes, removed from inbox | No | Any suspicious message |
| Block sender | Sender menu or Junk email settings | Yes, when applied to the message | Yes, for that exact address, through junk filtering | Same address keeps returning |
| Junk | Home ribbon or Junk option | Yes, moved to Junk | Partly, filtering learns | Unwanted mail that isn't phishing |
| Safe Senders | Junk email settings, Safe senders list | No, sent to inbox | No blocking, future mail bypasses filtering | Avoid for unknown or suspicious senders |
Why reporting beats an expanding block list
Attackers can change sending addresses or reuse the same display name across different accounts. Blocking a message labeled as your bank doesn't block everyone who might impersonate that bank.
That answers a common frustration: Why am I still receiving phishing emails after blocking the sender? The next message may come from a different address, even if its name, logo, and wording look identical. Address blocking isn't an organization-wide impersonation defense.
Keep a short blocked-senders list for persistent addresses rather than spending time chasing every disposable sender. A report is still useful when an address changes, because it identifies the message as abusive rather than merely unwanted.
Clean up exceptions before adding rules
Safe Senders is the row that deserves particular caution. It's an exception to filtering, not a security endorsement, and it shouldn't be used to make an unexplained warning disappear.
- Review blocked senders. In Outlook.com and new Outlook, open Settings > Mail > Junk email and inspect the blocked-senders list.
- Remove habitual exceptions. Review Safe Senders and remove addresses you added because a message looked official or you wanted it delivered quickly.
- Keep rules narrow. Target a specific sender or a recognizable pattern tied to a known scam. Don't automatically hide messages containing broad words such as invoice or Microsoft, which can conceal real bills and account notices.
Report first. Block on repeat. Never safe-list a sender just to get around a warning.
Classic Outlook and Mac arrange these controls differently. On work and school accounts, administrators may also control reporting, allowlists, and filtering policies, so a local setting might not override the organization's protection.
How to Report Phishing in Outlook on Every Platform
- Select the suspicious message. You don't need to open its links, download attachments, or reply before reporting it.
- Choose Report > Report phishing. Use the reporting control appropriate to your Outlook version.
- Confirm it left the inbox. If a copy remains, delete it after reporting. Don't recover it just to inspect a suspicious link.
- Use a fallback if necessary. On mobile, move the message to Junk if phishing reporting isn't available, then report it from Outlook on the web or desktop.
Use this visual reminder beside your device while you find the reporting menu.
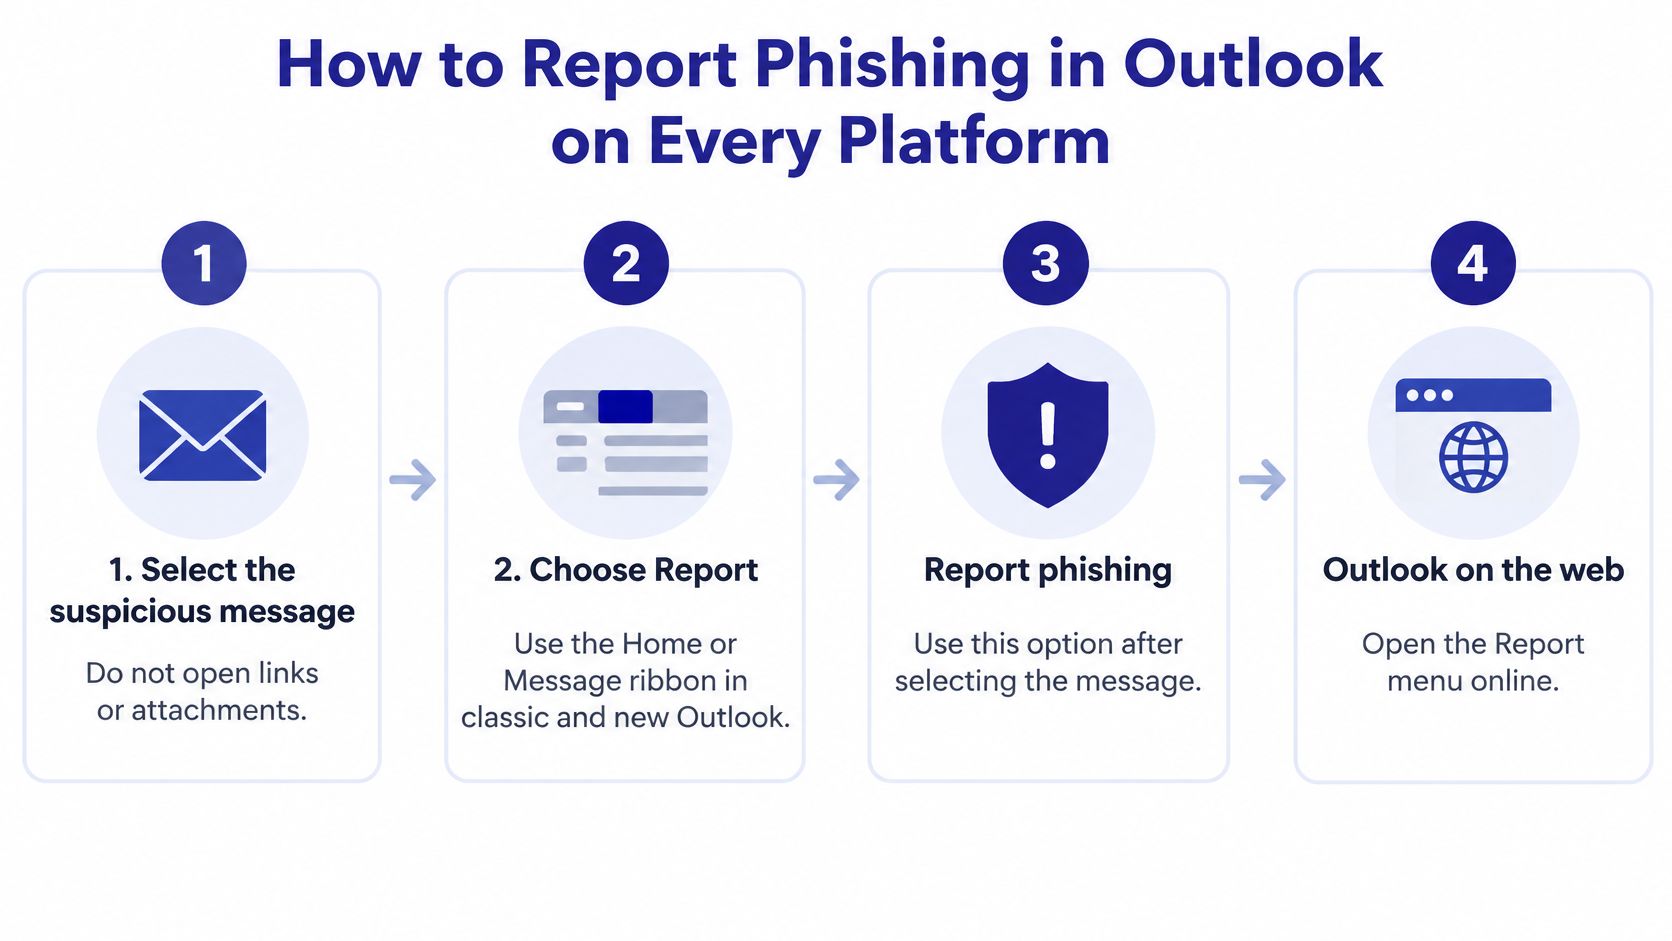
Find the control in your Outlook version
Classic Outlook and new Outlook: Select the message, then look for Report on the Home or Message ribbon and choose Report Phishing. Ribbon layouts can differ, so check the expanded menu if the button isn't immediately visible.
Outlook on the web: Select the message in the message list and open the Report menu. Choose the phishing option rather than ordinary junk when the message is trying to deceive you.
Outlook for Mac: Select the message and look under the Message menu for the reporting option. Microsoft's built-in reporting documentation explains that phishing can be reported from any email folder, while junk reports are handled from folders other than Junk Email.
Outlook mobile: Open the message's more menu. If Report phishing doesn't appear, move it to Junk, or block a persistent sender, and complete the phishing report later through the web or desktop app.
The video provides another way to follow the Outlook reporting workflow.
Confirm the result without spreading the message
On work and school Microsoft 365 accounts, administrators can route reports to Microsoft, an organizational reporting mailbox, or both. Follow your IT team's instructions rather than forwarding suspicious content to colleagues for an informal verdict.
Success means the message is gone, you haven't replied or forwarded it, and you understand that reporting hasn't automatically blocked the sender. Before emptying Junk, review it for legitimate mail and move mistaken detections back to the inbox.
Built-in Protections to Check in Outlook Settings
Outlook.com automatically checks links for phishing or malware and can redirect suspicious clicks to a warning page. Eligible Microsoft 365 subscribers also receive attachment scanning that removes dangerous files, as described in Microsoft's advanced Outlook.com security guidance.
These protections reduce exposure, but they aren't proof that every delivered message is safe. Keep available link protection enabled and treat a warning as a reason to stop, not an obstacle to dismiss.
Use Outlook's settings review to preserve protection rather than make every message easier to open.
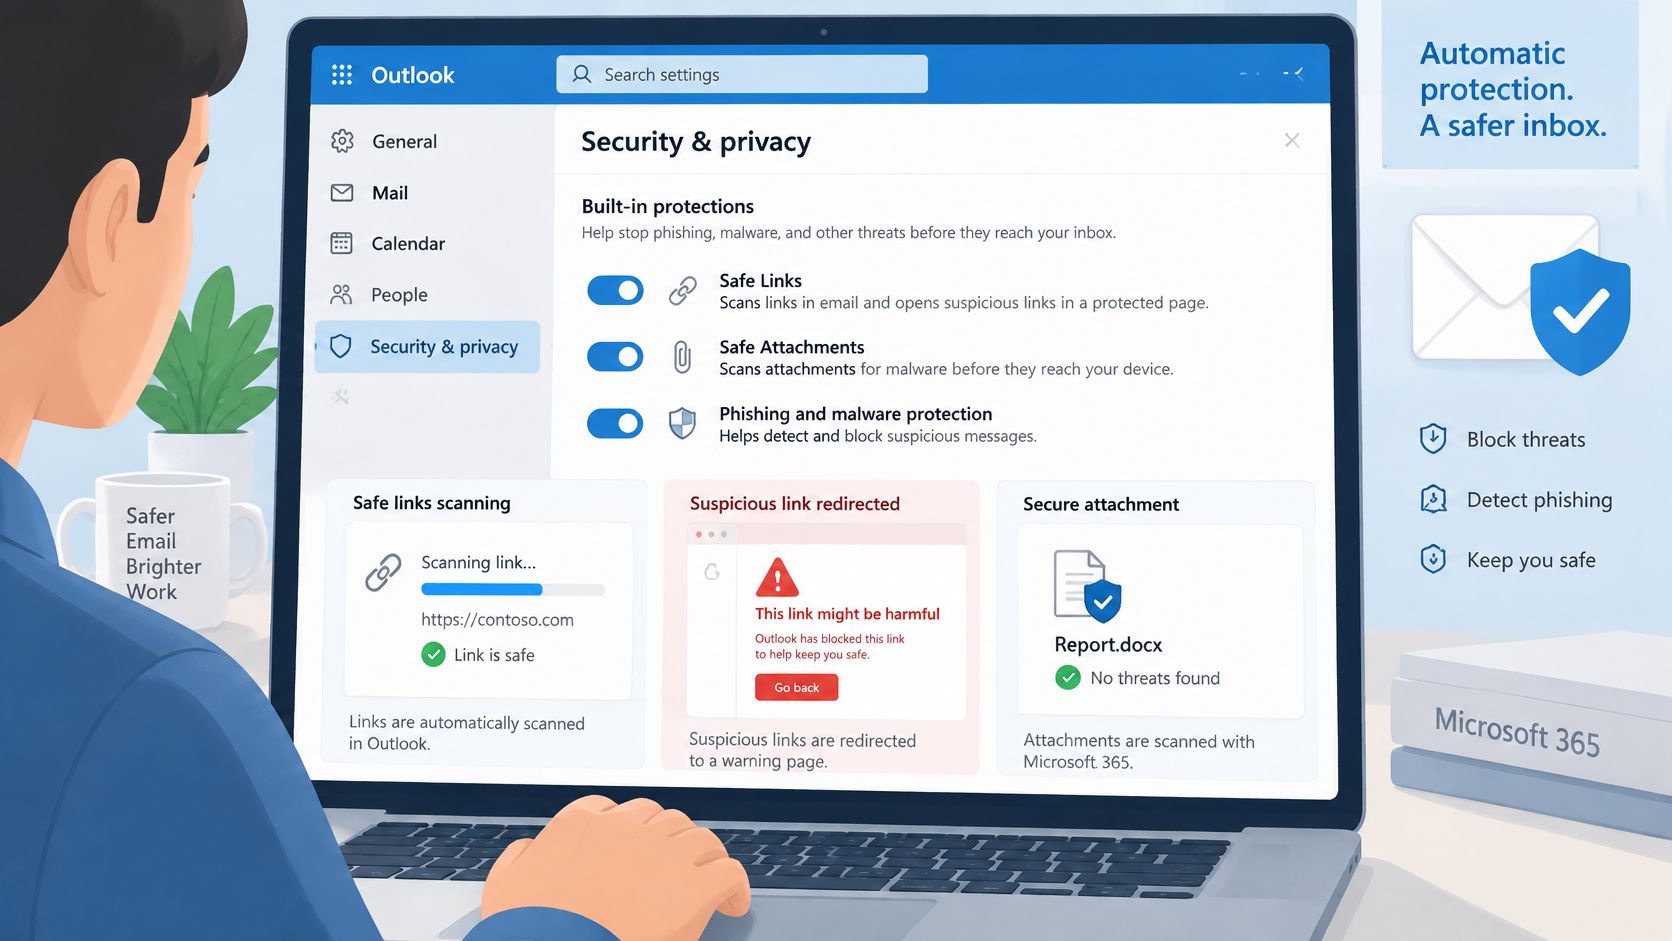
Outlook warning indicators and what to do
| Warning | What it means | What to do |
|---|---|---|
| Yellow safety bar | Attachments, pictures or links were blocked | Verify the item through a separate channel before opening anything |
| Red safety bar | Outlook blocked potentially unsafe content | Report the message as phishing and delete it |
| Unverified sender | Spoof intelligence cannot confirm the sender | Treat the request as suspicious and don't reply |
Check destinations, not just wording
Hover over a link without clicking and read the actual destination. Compare it with the organization the message claims to represent, not merely the company name embedded somewhere in the address.
If you can't confidently interpret the destination, don't experiment by opening it. Use a saved bookmark, the organization's app, or an address you already know, and check whether the requested action appears there.
Never enter a password after following an unsolicited email link. A familiar sender name isn't enough either: Exchange Online Protection uses spoof intelligence and can mark suspicious senders as unverified.
Work accounts need administrator checks too
For eligible Microsoft 365 organizations, Microsoft's anti-phishing tuning guidance recommends layered controls, including preset security policies, Safe Links, Safe Attachments, and post-delivery protection. Safe Links checks destinations at click time, while Safe Attachments uses dynamic analysis to inspect potential threats.
Ask your administrator to review protection coverage rather than create a broad exception when legitimate messages are caught. Preserve warning banners, and keep any necessary exclusions narrow, documented, and reviewed.
What to Do If You Already Clicked a Link
Start with what you did, not whether the message looked convincing. Opening an email, downloading a file, and submitting a password each call for a different response. Microsoft's guidance on phishing and suspicious behavior in Outlook covers the checks worth running after a suspected compromise: passwords, sign-in activity, forwarding rules, recovery details, and malware exposure.
Choose the branch that matches your exposure
- Only opened the message: Report it and delete it. Reporting matters here even though nothing happened, because each report teaches Outlook's filters to catch the next copy. If you didn't follow a link, download a file, or submit information, don't assume your account was taken over; run a malware scan if the device behaves oddly.
- Clicked a link but entered nothing: Close the page and don't approve notifications, downloads, or sign-in prompts. Check whether anything downloaded, and review recent account activity by navigating directly to the official site.
- Downloaded an attachment: Don't open the file again. Scan the device with security software, and disconnect it from the network if you notice suspicious behavior; on a work device, contact IT promptly.
- Entered a password: Go directly to the official account site, change the password, and enable two-step verification. If you reused that password elsewhere, change it on those accounts too, because the exposed password could be tried there.
- Sent money or card details: Contact your bank or card issuer immediately using its app or a known number. Explain what happened and ask about securing the account and disputing or recalling the transaction.
For a walkthrough of each branch in more detail, use our guide on what to do after clicking a phishing link.
Recovery priority: Secure the account through a trusted route. Don't use the suspicious message's support number, recovery button, or reply address.
Check for access that could remain
A new password isn't the whole cleanup. A phished account often stays open through settings the attacker changed, so review recent sign-ins, forwarding rules, connected apps and accounts, recovery email and phone details, and automatic replies. Remove anything you don't recognize.
For caregivers helping a relative, preserve evidence first: screenshots showing the message, the sender's actual address, and any payment request. Don't forward dangerous attachments or ask the relative to reopen a suspicious page for a better screenshot.
Clicking happens to everyone, and speed matters more than fault. A calm, complete review beats self-blame every time.
Before considering the cleanup complete, confirm:
- Account access: The password is unique and two-step verification is enabled.
- Account settings: Recovery details, forwarding, connected apps, and replies are yours.
- Device status: Downloaded files have been checked and security scans completed.
- Financial exposure: Your bank or card issuer knows about any disclosed payment information.
Set Up Your Outlook Defenses Today
Finish these actions this week: report a suspicious message and confirm it leaves the inbox, clean your Safe Senders and blocked-senders lists, and decide how you'll independently check urgent payment or password requests. Choose a known phone number or the official site, never contact details supplied by the questionable message.
Make those habits part of your everyday email security practices. A short routine you follow is more useful than complicated rules that hide legitimate correspondence.
Add screening if you want another layer
Gini Help scans a connected Gmail, Outlook, or Yahoo inbox for phishing, flags fake links and urgent payment requests, and explains risks in plain language before you click dangerous links. Every plan includes text and email scam scanning; email checking starts only when you connect your inbox.
You can watch a live browser demo of Gini blocking a real spam call before signing up. For the app, download Gini Help from Google Play or the App Store.
No screening catches every scam, so independently verify important requests. Today, practice reporting without opening anything in the message, then keep the routine: pause, verify, report, delete.
Give your Outlook inbox another layer of screening with phishing warnings that explain what looks suspicious. Visit Gini Help to explore email protection and watch the live demo before deciding whether to connect your inbox.