Spotting an Outlook Phishing Email Before It’s Too Late
By Josh C.
Microsoft detected approximately 7.6 billion email-based phishing threats in the second quarter of 2026, so the safest response to an Outlook phishing email is to pause, avoid the link or QR code, check the true destination, and report the message. A polished email can still be a trap, and failing to use Outlook's Report button while skipping the destination check may hand your password to a thief.
Your Outlook notification might look like a routine Microsoft account warning: familiar blue branding, a professional layout, and a subject line saying you must verify your account immediately. You're busy, the message sounds urgent, and the button appears to lead to Microsoft. Before you click, remember that modern phishing detection is less about finding spelling mistakes and more about checking where the message sends you.
The Outlook Inbox Trap You Almost Fell For
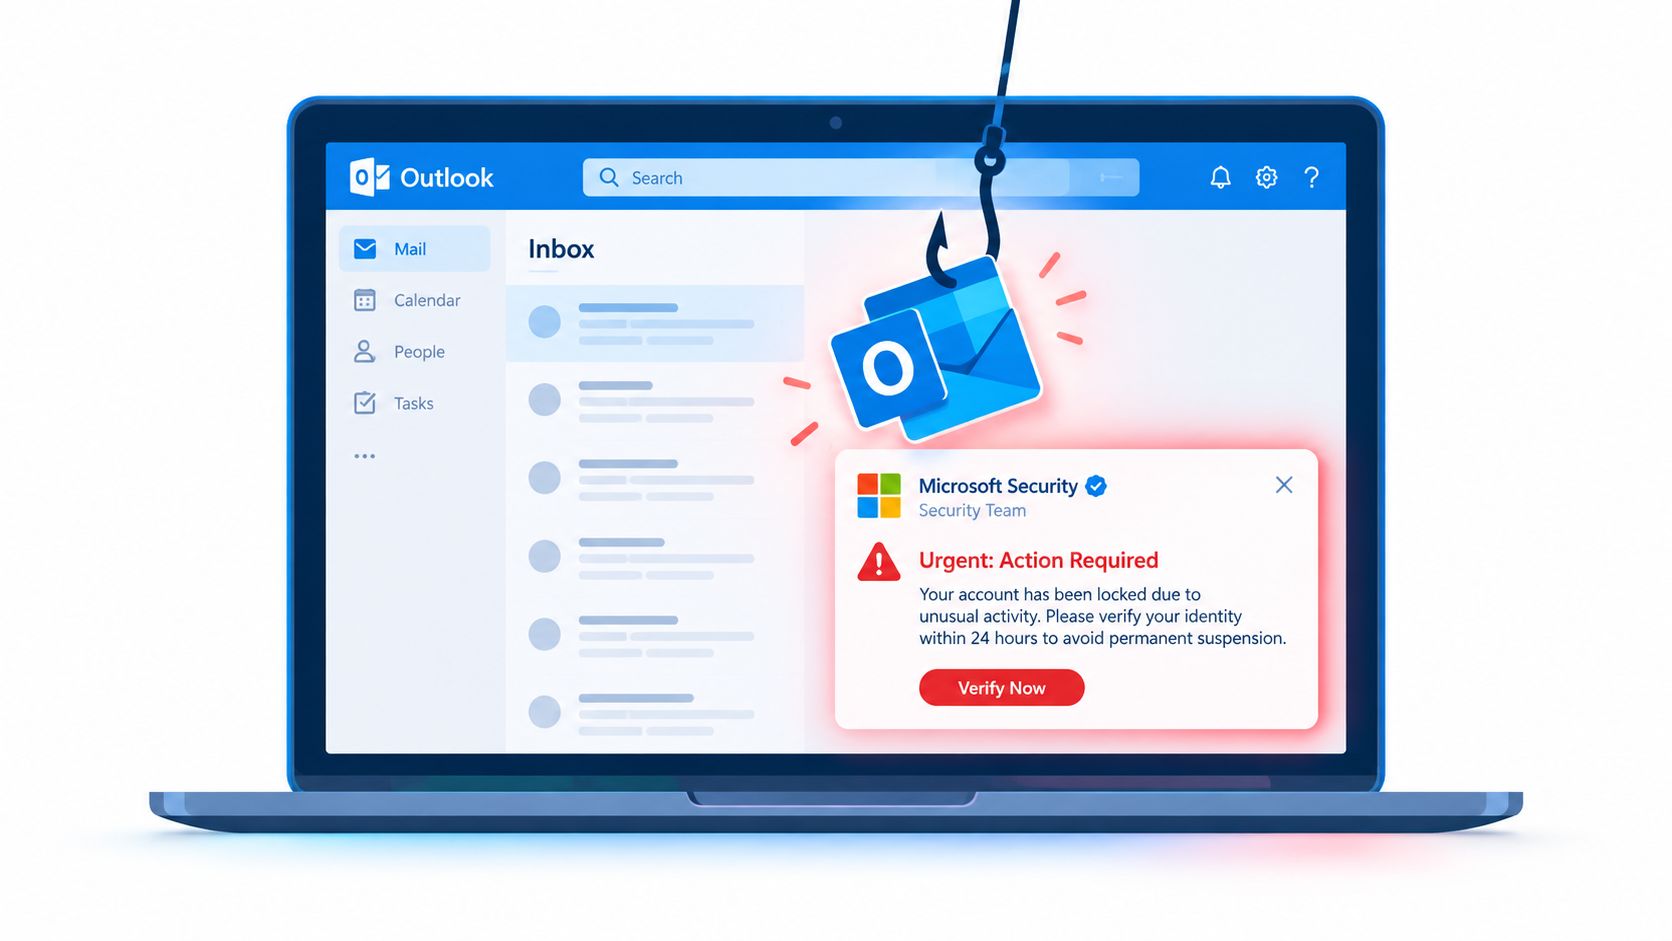
Your phone buzzes while you're preparing breakfast. The notification says your Microsoft account needs immediate verification. The email uses a clean security template, includes a familiar logo, and warns that access could be suspended if you don't act.
You open it in Outlook. The sender name says “Microsoft Security,” the wording sounds formal, and the button reads Verify account. Nothing looks obviously wrong. There are no cartoonish graphics, strange fonts, or clumsy sentences to give the attacker away.
That's the trap. If you click without checking the destination and without using Outlook's built-in reporting tool, you may be giving a criminal your password. The page can imitate a Microsoft sign-in screen closely enough that careful readers may enter their credentials before noticing anything unusual.
Why polished messages create pressure
Phishing depends on more than technology. Attackers use urgency, authority, fear, and routine to shorten the time you spend thinking. A message about account suspension pushes you toward immediate action. A payment request may exploit responsibility. A delivery notification may use curiosity.
Microsoft's security reporting shows the scale behind these individual messages. The company detected approximately 7.6 billion email-based phishing threats during the second quarter of 2026, demonstrating that phishing remains widespread across Outlook and Microsoft 365 environments even as defenses improve (Microsoft's Digital Defense reporting).
A message can also appear to come from someone you know. Attackers may imitate a trusted organization, use a look-alike domain, or send mail from a compromised business account. The familiar name lowers your guard, while the urgent request discourages independent verification.
Practical rule: A professional appearance proves that someone designed the email carefully. It doesn't prove that Microsoft, your bank, or your employer sent it.
Readers who want to understand why intelligent, careful people still respond to scams can explore this useful discussion of scam hooks that trap smart people. The key lesson is simple: your eyes assess the visible message, but the attacker's real objective often sits behind the button.
How Outlook Detects and Flags Suspicious Mail
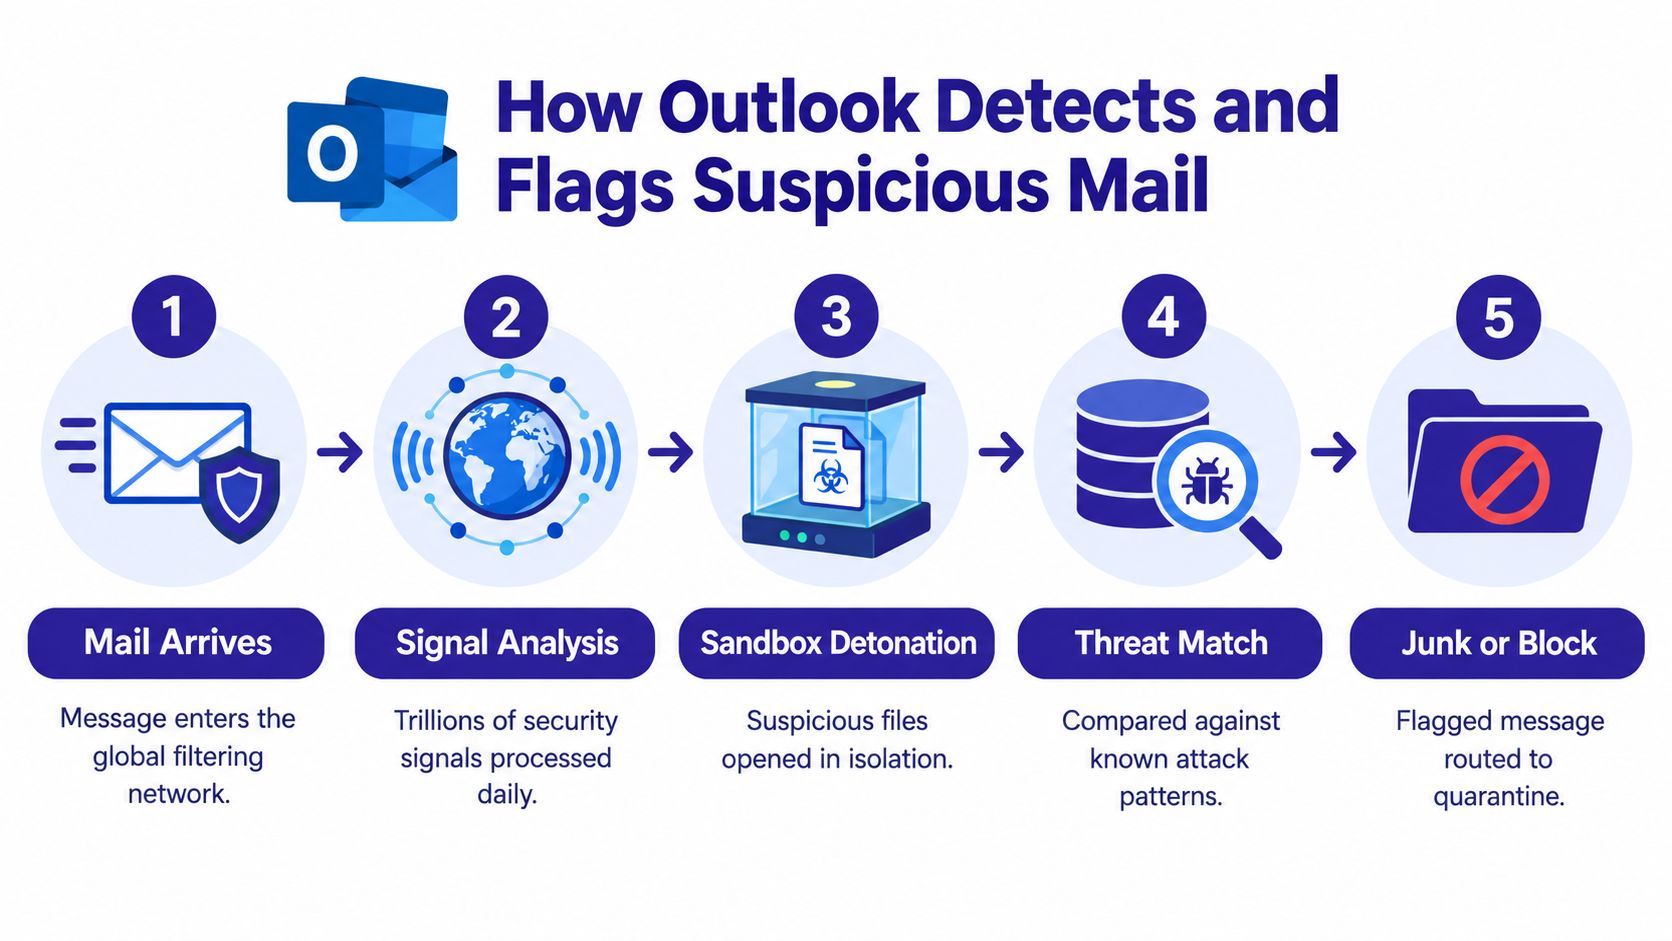
Outlook doesn't rely on one warning or one list of bad senders. Microsoft combines sender information, message content, link signals, attachment analysis, and broader threat intelligence to decide whether a message should reach your inbox.
Between January and September 2018, Microsoft reported that Office 365 systems analyzed approximately 400 billion emails each month, processed 6.5 trillion security signals every day, and detonated about 1 billion potentially dangerous items in a sandbox (Microsoft's explanation of Office 365 phishing defense). The figures show that Outlook protection operates at industrial scale, not as a small desktop filter.
What the visible warnings mean
Outlook may display a question-mark icon when it can't verify the sender's identity. It may also show an underlined “via” tag when the actual sending address differs from the visible From address. These signs deserve attention, but neither one automatically proves that the email is malicious.
A legitimate organization may use a mailing service that sends on its behalf. Conversely, a dangerous message might pass some authentication checks if it comes from a compromised account or a look-alike domain. Treat the indicators as prompts to investigate, not as a complete verdict.
Why deep-link analysis matters more
The visible sender and the visible button tell only part of the story. Security systems can inspect the message headers, evaluate URLs against reputation information, look for malicious macros, and analyze attachments in an isolated environment. That deeper work helps identify threats that aren't obvious from the wording.
You can think of the process as airport security. The boarding pass is the visible email, while the destination, baggage, and identity checks happen behind the scenes. A neat boarding pass doesn't guarantee that the traveler or destination is safe.
For readers who want a separate explanation of how suspicious messages are evaluated, this guide to phishing email detection offers another practical reference.
Outlook's filters reduce risk, but they can't replace judgment. An authenticated message can still come from an account that criminals control, and a convincing sign-in page can still steal credentials. Your safest role is to inspect the request before you activate its destination.
Using the Report Phishing Tool Correctly
When an Outlook message looks suspicious, don't reply, click, scan, or open its attachment. Report it from the inbox instead.
Report the message
- Select the email: Choose the suspicious message without opening links or attachments.
- Open the reporting menu: In Microsoft 365 Outlook or Outlook.com, choose Report.
- Choose the threat type: Select Report phishing.
- Allow Outlook to process it: Microsoft describes this action as a way to remove the message from your inbox and improve filtering.
Reporting helps Microsoft and your organization recognize related activity. It also creates a useful record for security teams, particularly when several people receive the same campaign.
Block the sender separately
There's an important limitation. Selecting Report > Report phishing reports the sender, but it doesn't block that sender from sending additional messages. To stop further mail from that address, add it separately to Outlook's Blocked Senders list, as Microsoft explains in its guidance on phishing and suspicious behavior in Outlook.
The distinction is easy to miss because reporting feels like a complete action. It isn't. Reporting tells the service that the message is suspicious. Blocking tells your mailbox not to accept further messages from that address. An attacker may still switch to another address, so blocking one sender won't eliminate the wider campaign, but it can reduce repeat messages from the same account.
Remember: Report first for analysis and filtering. Block separately if you want to stop more mail from that address.
If you're unsure what should happen after Outlook flags a message, this guide on how to review flagged emails can help you examine the warning without interacting with the suspicious content.
Inspecting the Hidden Dangers in Links and QR Codes
A phishing email often becomes dangerous at the moment you activate its payload. The text may be harmless, but the link can lead to a counterfeit login page, a malicious download, or a redirect that hides the final destination.
CISA recommends checking message headers and content, evaluating URLs against reputation information, inspecting suspicious links safely, and blocking executable extensions such as .scr, .exe, and .pif (CISA's counter-phishing recommendations). These controls matter because the visible email may not match what the browser or Office application eventually opens.
A three-step destination check
First, pause at the request. Ask what the sender wants. Is it a password, payment, account verification, document download, or security-code request? Urgency doesn't make the request legitimate. If you weren't expecting it, don't use the contact details inside the message to verify it.
Second, inspect without opening. On a computer, hover over the link and read the destination preview. Look for a domain that doesn't match the organization, a shortened address, an unexpected redirect, or a misspelled brand name. Don't click merely to see where it goes. On a phone, avoid tapping unknown links because touch interfaces can make inspection harder.
Third, treat QR codes and PDFs as destinations too. A QR code isn't safer than a hyperlink. It can send your phone to a fake sign-in page without showing you the address first. A PDF can contain a link, a button, or instructions that direct you to a fraudulent site. Don't scan an unexpected code or open an unfamiliar attachment just because the email looks official.
A delivery email containing a QR code deserves the same caution as a suspicious button. The code may be presented as a convenient way to reschedule delivery, but convenience is exactly what persuades people to skip verification. For a general look at how legitimate QR-code cards work, see this explanation of QR code card setup, then apply the same principle defensively: a code's appearance tells you nothing about its destination.
Verify outside the email
Open a new browser window and type the organization's known website yourself, or use a trusted phone number from a statement or official card. For a workplace request, contact the colleague through a separate channel. Don't reply to the suspicious message, because the account may be controlled by the attacker.
Destination checking changes the question from “Does this email look real?” to “Where will this action take me?” That question works even when grammar, branding, and formatting look perfect.
Why Outlook Alone Is Not Enough Protection
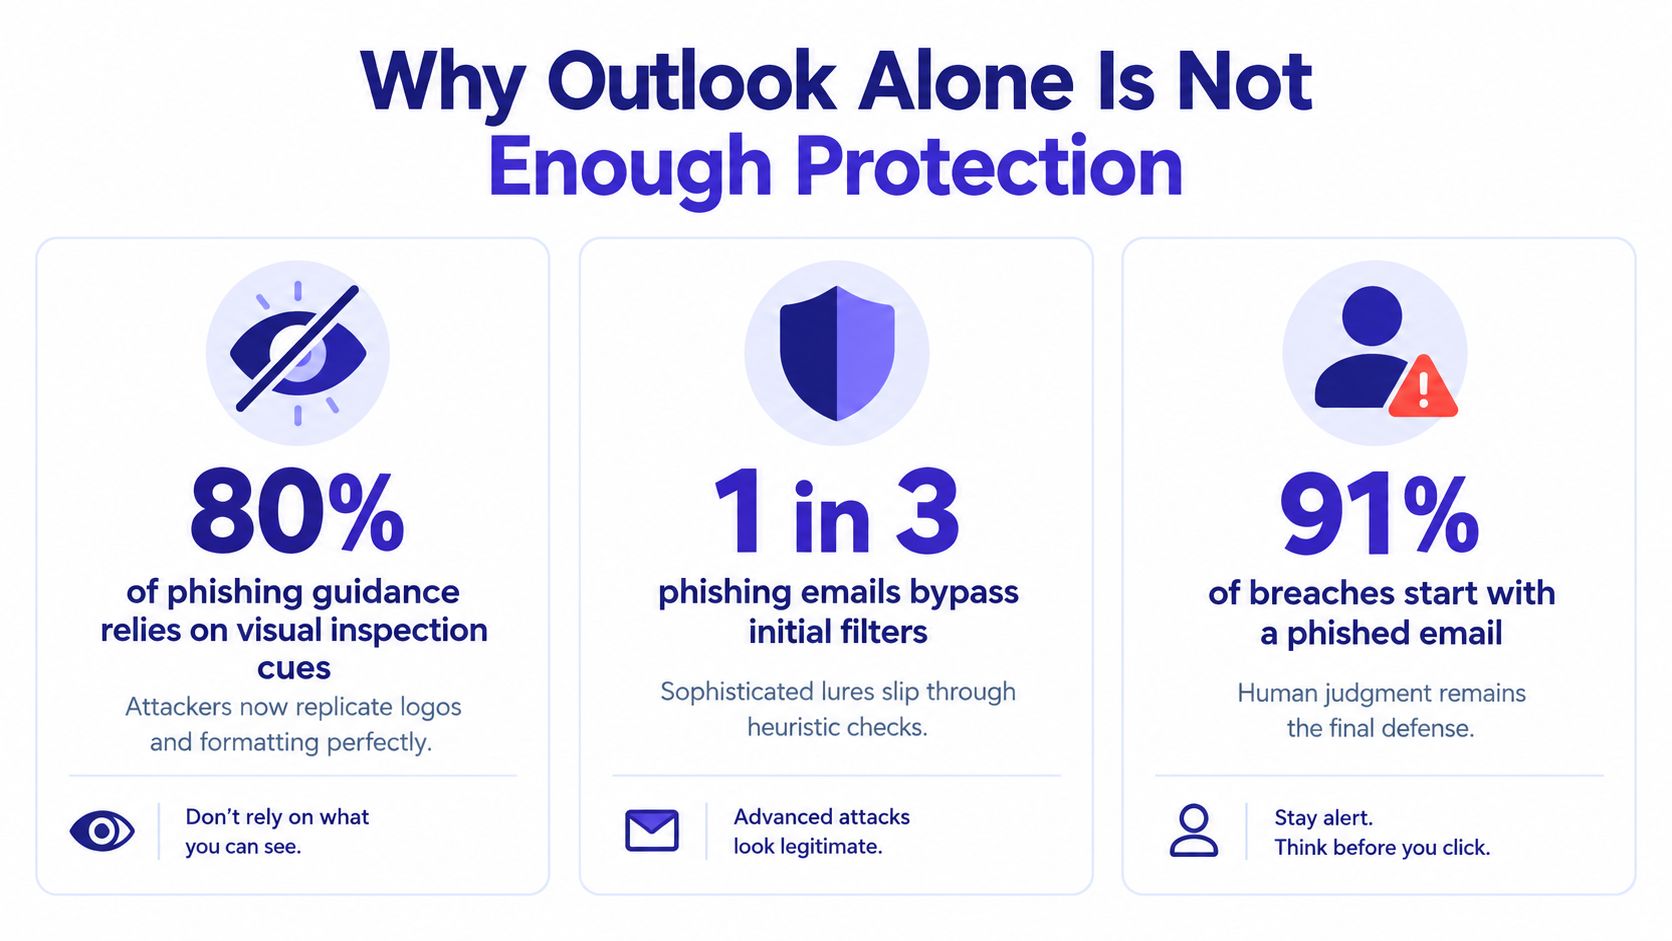
Outlook's filters are valuable, but no inbox tool can make every decision for you. The difficult messages are often the ones that look operationally legitimate, use familiar branding, or arrive through infrastructure that doesn't immediately appear suspicious.
Microsoft reported approximately 8.3 billion email-based phishing threats in the first quarter of 2026, with 78% link-based. The same reporting described QR-code phishing as more than doubling during the quarter (Microsoft's Q1 2026 email threat analysis). Those figures point to a practical shift: the dangerous action may happen through a link, QR code, or document rather than an obviously suspicious sentence.
Filters and people solve different problems
Outlook can compare technical signals across enormous volumes of mail. It can flag suspicious senders, inspect links, and isolate dangerous files. It can't know every legitimate request you expect, whether a supplier changed its payment details, or whether your colleague really asked you to sign in through an unfamiliar page.
That is where human context matters. A message can be technically authenticated and still be harmful if an attacker controls the account. A look-alike domain can also authenticate successfully while impersonating a trusted organization. In both cases, the recipient must evaluate the request and destination.
Microsoft's Digital Defense reporting states that 28% of analyzed breaches were initiated through phishing or social engineering and that AI-driven phishing was three times more effective than traditional campaigns (Microsoft's Digital Defense Report 2025). Polished grammar and accurate logos are therefore weak evidence of safety.
The modern inbox requires layered decisions
Use Outlook's detection features as the first layer, not the final answer. A sensible approach combines:
- Technical warnings: Pay attention to question-mark icons, “via” tags, unusual sender addresses, and security banners.
- Destination checks: Inspect links without opening them, avoid unexpected QR codes, and treat PDF buttons as links.
- Independent verification: Contact the supposed sender through a known channel before sharing credentials or approving money movement.
- Reporting and recovery: Report the message, block the sender when appropriate, and take account-recovery steps if you already entered information.
The point isn't to distrust every email. It's to reserve trust for requests you can verify. A normal newsletter and an urgent password-reset request deserve different levels of scrutiny.
A clean email is evidence of clean presentation, not evidence of a safe destination.
Taking Proactive Steps to Secure Your Email
A second protection layer can help people who receive large volumes of email, share devices with family members, or find technical warning signs difficult to interpret. The FBI's 2025 Internet Crime Report recorded 191,561 complaints categorized as phishing or spoofing (FBI Internet Crime Report). The category covers unsolicited communications that claim to come from legitimate companies while requesting personal, financial, or login information.
That scale makes a simple point. You shouldn't depend only on recognizing known bad senders, because criminals can change addresses, copy legitimate branding, and alter their wording. A dynamic screening layer can examine the message itself, its sender, its links, and the request's context.
What an additional layer can do
Tools differ, so check their privacy terms and supported accounts before connecting email. A service such as Gini Help can screen supported calls, texts, and email accounts, including Outlook, for indicators associated with spam, scams, suspicious links, urgent requests, and requests for sensitive information. It can provide a warning or risk assessment that gives a nontechnical user another opportunity to pause.
That doesn't replace Outlook's reporting feature or your own verification. It adds another review point before you act. For a focused overview of protective practices, see this guide on how to stay safe from viruses, especially the advice about avoiding unexpected files and links.
A practical layered routine looks like this:
- Let Outlook filter the message.
- Read the request without activating its content.
- Check the true destination and sender.
- Use a second screening layer when available.
- Verify important requests independently.
- Report the message and begin recovery steps if you interacted with it.
The Outlook email security guide provides additional context for combining mailbox controls with safer user habits. The goal isn't to create fear around email. It's to make pausing and verifying easier than reacting.
How to Download the Gini Help Protection App
Gini Help can add a screening layer across email, calls, and texts on a mobile device. It's useful for people who manage Outlook from a phone, help an older family member, or want suspicious communications reviewed before they respond.
Download it on Android
- Open Google Play on your Android phone.
- Search for Gini Help.
- Confirm that the app name matches the intended protection service.
- Install it from the Gini Help Google Play listing.
- Open the app and follow its setup prompts.
- Review the permissions carefully and connect only the accounts and features you want to protect.
- If you connect Outlook, complete the account authorization through the official sign-in flow rather than entering credentials into an email link.
Download it on iPhone
- Open the App Store.
- Search for Gini Help.
- Install it from the Gini Help App Store listing.
- Launch the app and complete the guided setup.
- Enable the protection features that fit your needs.
- Connect your Outlook account through the app's authorized account connection process.
- Test the warning and review functions before relying on them for an important message.
| Platform | Download Link |
|---|---|
| Android | Download Gini Help on Google Play |
| iPhone | Download Gini Help on the App Store |
Keep Outlook's own protections enabled, and continue using Report > Report phishing for suspicious messages. An app can help you assess risk, but you should still avoid entering passwords or payment information until you've verified the request independently.
Gini Help screens supported calls, texts, and email for scam indicators, giving you another warning before an Outlook phishing email turns into a stolen password or compromised account. Visit Gini Help to review the available protection features and add a practical second layer to your everyday communication safety.