Outlook Spam Settings: A Complete 2026 Guide
By Josh C.
A message from your doctor's office is missing, but a string of fake delivery notices and urgent account warnings keeps landing in your Outlook inbox. You open settings, see several switches and sender lists, and wonder which change will help without hiding the email you need.
The key is to treat Outlook spam settings as layers, not a single on-off filter. Lists, mailbox-level junk controls, and Microsoft's broader threat detections have different jobs, and none makes every dangerous message disappear.
How Outlook Spam Settings Actually Work
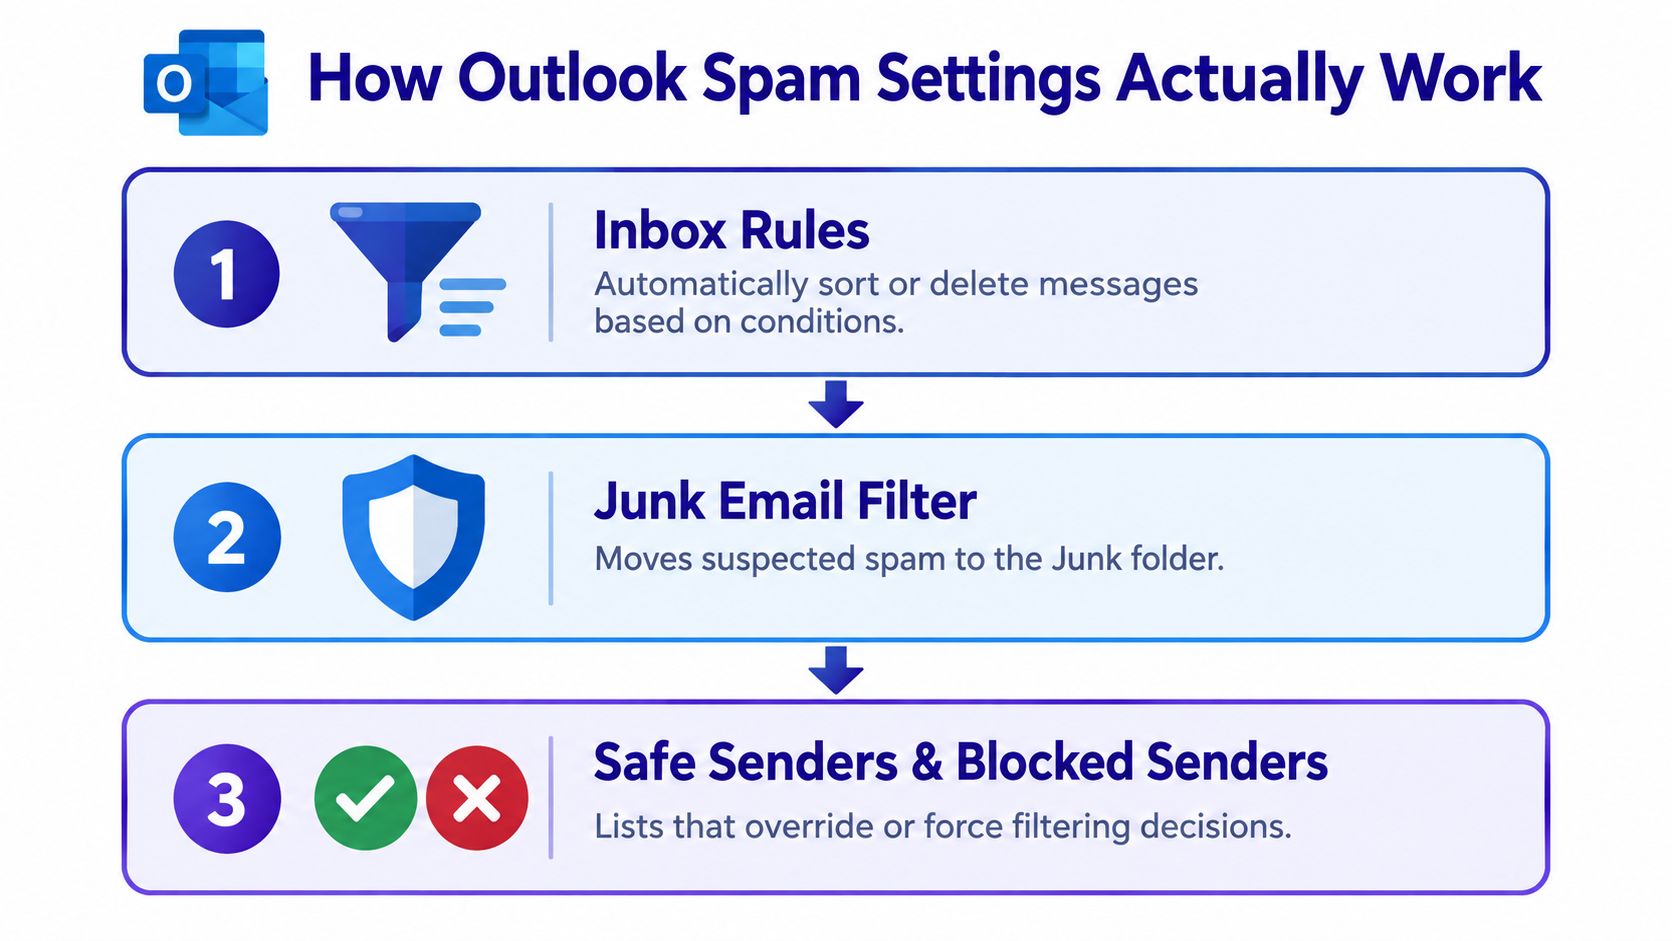
Outlook's protection combines user-maintained lists, mailbox-level filtering, and higher-priority Microsoft detections. The settings you can see in Outlook on the web or desktop mostly help sort messages after they reach your mailbox. They're useful for reducing repeat nuisance mail, but they aren't a guarantee that suspicious email will never appear.
Three controls, different jobs
Start with the lists. Safe Senders identifies addresses or domains you trust, Safe Recipients covers mailing lists you trust, and Blocked Senders identifies sources you don't want in your Inbox. Outlook can apply these decisions to an individual address or a whole domain. Microsoft documents capacity for up to 10,000 entries in the blocked-senders and safe-senders lists, but Safe Senders entries in Microsoft 365 apply to one mailbox, not everyone in a household or organization (Microsoft's Outlook junk-email guidance).
The second layer is the Junk Email Filter. In classic Outlook for Windows, its protection choices include No Automatic Filtering, Low, High, and Safe Lists Only. These determine how aggressively Outlook classifies incoming mail. In Outlook on the web, a setting called Automatically filter junk email applies the safe and blocked lists and moves suspected junk into the Junk Email folder.
The third layer consists of Microsoft's broader security detections. In Exchange Online, a Safe Senders entry can influence spam filtering, but it doesn't overrule higher-priority detections such as malware or high-confidence phishing. That's an important distinction: adding an address to a safe list isn't a universal approval of every message from that sender.
Practical rule: Use lists to manage known senders, filtering options to adjust how much mail goes to Junk, and Microsoft's higher-level detections as a separate security layer. Don't treat any one setting as a complete security verdict.
These differences matter whether you use the browser, desktop program, or mobile app. For a broader checklist of protective practices beyond Outlook's own controls, CloudOrbis Inc.’s email security best practices for 2025 offers useful context.
Configuring Outlook Spam Settings on the Web
If a wanted message lands in Junk while unwanted mail reaches your Inbox, check the web settings before adding more blocked senders. Menu labels vary by account; the search box inside Settings helps you find the controls.
Find the Junk email pane
- Open Outlook in your browser and select the Settings gear.
- In the Settings search box, type Junk.
- Open Junk email in the results.
- Review Automatically filter junk email. When enabled, it applies your Safe Senders and Blocked Senders lists and moves suspected junk into Junk Email (Microsoft's Exchange Online settings documentation).
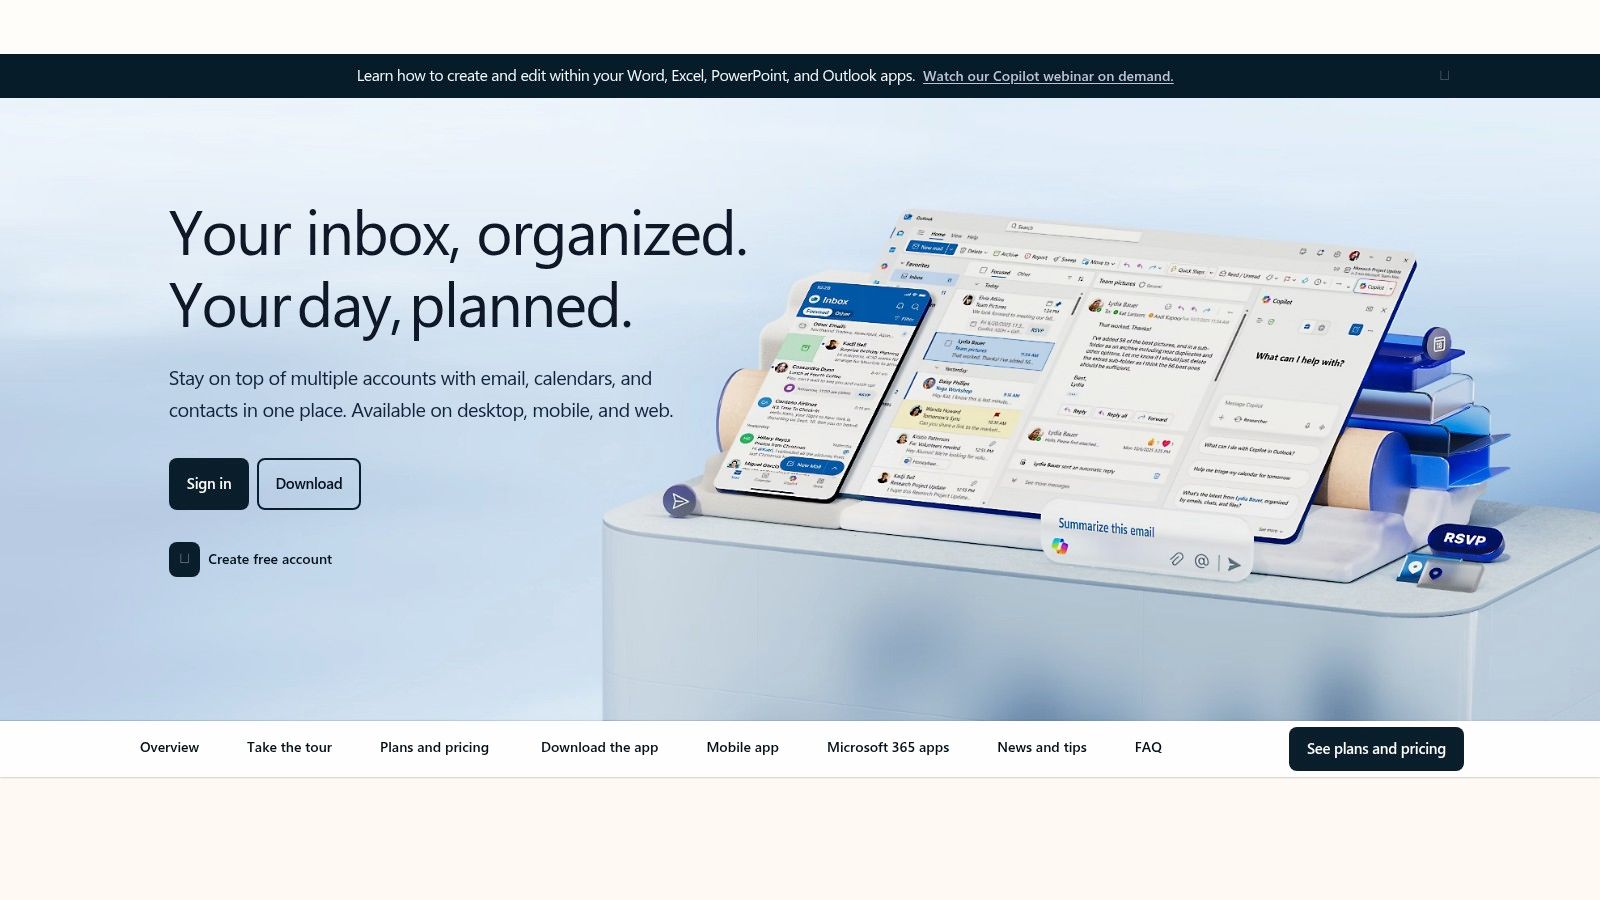
Find Safe Senders and Domains and Blocked Senders and Domains in the same pane. Use an exact address for one trusted contact. A domain entry covers an organization more broadly, so blocking it can divert legitimate mail alongside unwanted messages. Review existing entries for spelling errors and outdated exceptions.
Review extra protection and confirm the result
If available, Block attachments, pictures, and links from people who aren't on my Safe Senders list limits access to content from unknown senders. The trade-off is that legitimate messages may become less convenient to use until you trust the sender.
Stage the rollout of Only trust email from addresses in my Safe Senders list: add known contacts first, save and test those entries, then enable the option and check Junk regularly. First-time messages from clinics, schools, employers, or service providers may otherwise be missed.
An individual safe-listed address takes precedence over a blocked domain in these list controls (Microsoft's blocked and allowed sender settings). To verify this, add a domain you can test from to Blocked Senders and an address within it to Safe Senders. Select Save if offered, send a message from that address, and check Inbox and Junk Email. Remove temporary test entries afterward.
These tests confirm list behavior, not a security exemption. Organizational filters and Microsoft's higher-level detections can still affect delivery. If results differ, recheck spelling and address-versus-domain entries; work-account users may need their administrator to investigate. Blocking manages the sender list, while reporting phishing flags the suspicious message for review. Use the action that matches the problem.
Adjusting Junk Settings in Outlook Desktop and Outlook for Mac
A message keeps landing in the wrong folder even after you change the junk setting. In classic Outlook for Windows, check both the Junk Email Filter and custom mailbox rules: the filter uses protection levels and sender lists; rules follow conditions you define. Organizational filters and Microsoft's higher-level detections remain separate layers.
Classic Outlook for Windows
Select Home > Junk > Junk E-mail Options, then open the Options tab:
- No Automatic Filtering stops Outlook's local spam classification. Safe Senders, Safe Recipients, and Blocked Senders lists can still affect where messages go.
- Low catches obvious junk while letting more messages through.
- High applies stronger filtering, with a greater risk of moving legitimate mail to Junk. Review that folder regularly.
- Safe Lists Only treats mail outside Safe Senders or Safe Recipients as junk. Prepare your lists before enabling it, then monitor for missed first-time senders.
For the filter's scope, consult classic Outlook's Junk Email Filter overview; the protection-level guide explains the available settings.
Keep filtered messages available for review rather than choosing permanent deletion while testing.
Open Home > Rules > Manage Rules & Alerts and inspect rules that move, delete, or forward messages. Check their conditions and destination folders before changing the filter again. In new Outlook for Windows, open Settings and search for Rules or Junk email; the classic dialog does not apply.
Outlook for Mac
Check Outlook > About Outlook to identify your version before following menu instructions. In the classic layout, open Tools > Junk Email Protection. In new Outlook for Mac, open Settings and search for Junk email. If the control is unavailable for your account, check its web settings rather than looking for Windows-only protection levels.
Where No automatic filtering is offered, it disables local classification, not the account's server-side protection. Review the available safe and blocked lists separately.
Use the video to locate the controls before making changes.
After changing a setting, test expected mail and inspect both Inbox and Junk. If results differ, review rules and ask your work-account administrator about server-side filtering. Blocking a sender changes list handling; reporting phishing flags the suspicious message for review.
Managing Safe Senders, Blocked Senders, and Domain Rules
Your clinic's appointment reminder lands in Junk, but its billing messages arrive normally. Before allowing the entire clinic domain, check the reminder's full sender address and confirm it with the office. A safe list works best as a precision bypass: add the smallest entry that solves the delivery problem.
In classic Outlook, Safe Senders entries keep matching mail from being treated as junk by that filter, regardless of message content (Microsoft's classic Outlook filter overview). That makes broad entries a trade-off. Your personal list is one layer; organizational filtering and Microsoft's higher-level detections can still affect delivery. Safe-listing should not be treated as a guarantee that a message is harmless or will reach the Inbox.
Pick the list by sender
| Sender Type | Best List | Use a Whole Domain? | Example |
|---|---|---|---|
| Doctor's office | Safe Senders | Only after verifying its domain and confirming that several addresses send expected mail | Appointment and billing messages |
| School | Safe Senders | If the school consistently uses its verified domain | School notices |
| Retailer | Safe Senders only if needed | Prefer the exact sender address | An expected delivery notice |
| Recurring newsletter | Leave unlisted unless it repeatedly lands in Junk | Prefer the exact sender address | A publication you subscribed to |
| Confirmed scammer | Blocked Senders | Only if the domain is malicious and does not carry legitimate mail | A confirmed scam address |
A trusted person's address does not justify allowing their entire shared email domain.
Maintain entries, not just the filter level
In Outlook on the web, open Settings > Mail > Junk email and inspect the safe and blocked lists. Use the relevant list's Add control, enter the address or domain, and save if prompted. In classic Outlook, open Home > Junk > Junk E-mail Options, then select Safe Senders or Blocked Senders.
Remove obsolete entries and check broad domains before tightening filtering. If you plan to allow only listed senders, build the list from expected correspondence first, then review Junk during testing. Keep recovery possible rather than permanently deleting filtered mail.
Blocked Senders helps with persistent nuisance addresses by directing matching messages to Junk. Domain blocks need the same care as domain allowances: a shared domain may also carry legitimate messages. Continue reporting suspicious attempts because a block only covers its matching entry. For example, a fake parcel-delivery campaign can switch both its sender address and domain with each message, leaving yesterday's block unable to catch today's variation.
Reporting Phishing, Blocking Senders, and Checking Quarantine
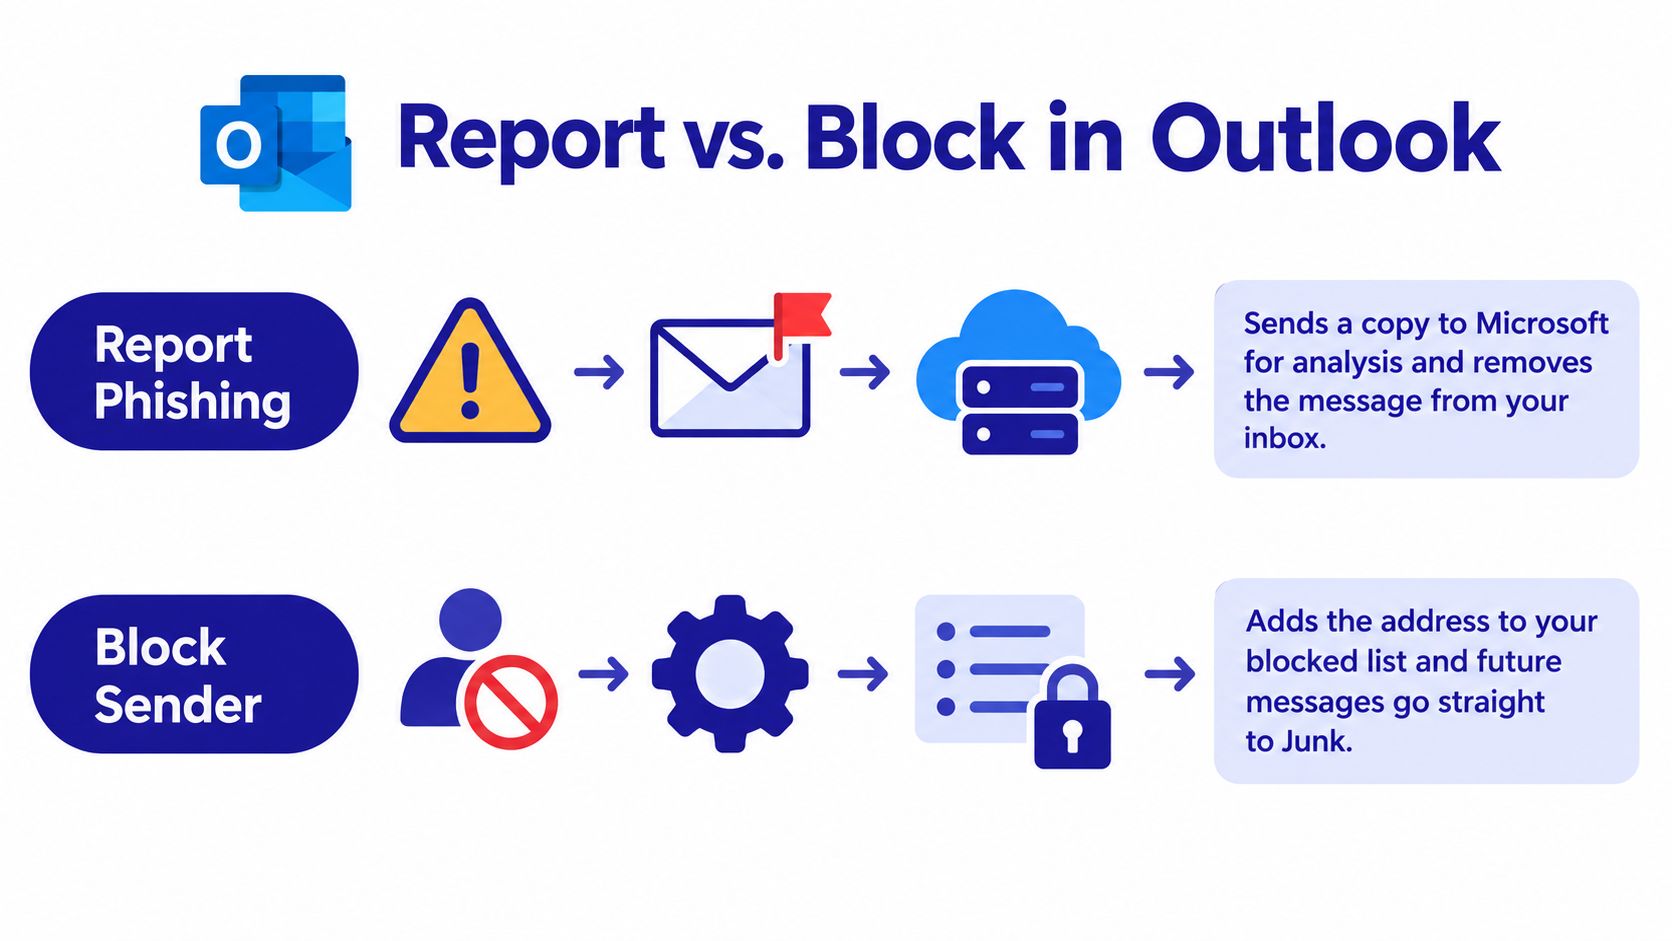
A phishing report and a sender block do different things. Selecting Report phishing reports the sender to Microsoft, but it doesn't prevent future messages. To stop repeat messages from that sender, add it separately to Blocked Senders (Microsoft's guidance on phishing and suspicious behavior).
Follow through after reporting
Suppose a message claims to be a Microsoft 365 security alert, but the sender address uses a look-alike domain. Don't click its sign-in button. Use Outlook's reporting option, then block the sender address. If the sender appears to be using a deceptive domain, assess that domain carefully before blocking it, especially if it could be shared by legitimate services.
Next, inspect forwarding and inbox rules. In Outlook on the web, open Settings > Mail > Rules and look for unfamiliar instructions that move, delete, or forward messages. Also check Settings > Mail > Forwarding for an address you don't recognize. For a work or school account, contact your IT team if you find an unknown rule or forwarding destination.
Report it, block it, then inspect the mailbox. Reporting helps Microsoft assess the message; blocking is the separate step that targets future mail from that sender.
For Microsoft 365 work or school accounts, an administrator may also provide a Quarantine view in Microsoft Defender. Access depends on your organization's permissions and setup. Review the sender and message details before taking action; use Release only when the message is legitimate, or delete it if it's clearly unwanted. Don't allowlist a sender just to make one message reappear without checking why it was quarantined.
A look-alike alert that reached your Inbox may be one message in a changing campaign, so monitor for similar messages from different addresses. For a broader explanation of how organizations use threat intelligence to recognize changing risks, see this Purple Shield threat feed guide. If you need a concise walk-through of Outlook-specific warning signs, use this guide to recognize and handle an Outlook phishing email.
When Strict Filtering Helps and When It Hurts
A new clinic sends your appointment instructions, but Safe Lists Only sends them to Junk because the address isn't on your safe list. This setting can sharply reduce unsolicited mail, but messages outside Safe Senders and Safe Recipients are classified as junk. That includes first contact from schools, repair services, travel providers, and employers. Microsoft's protection-level guidance explains the trade-off.
Choose strict filtering only if someone will maintain it.
Roll it out in stages
Before changing the setting, inventory the senders whose messages you cannot afford to miss: medical providers, schools, employers, financial contacts, and services with time-sensitive notices. Add their exact email addresses where possible. Approving an entire domain can admit mail from other users of that domain.
Use High as a trial before switching to Safe Lists Only. During the trial, check Junk daily and compare legitimate messages there against your inventory. Look for unfamiliar addresses used by known organizations, such as a separate appointment or billing address. Those gaps matter: under Safe Lists Only, unlisted legitimate senders would be treated as junk regardless of whether their messages look suspicious.
Then enable Safe Lists Only if the inventory looks manageable. Continue checking Junk daily during testing. If an important message lands there, verify it and add its exact sender before relying on the stricter setup. Keep reviewing as contacts and services change.
For caregivers: A Safe Senders entry applies only to the mailbox where you added it. In Microsoft 365, adding a clinic to one person's list doesn't protect other family members' mailboxes. Set up each account individually.
Safe lists are one layer. Organizational filters and higher-level Microsoft detections still affect delivery, so allowlisting is no guarantee that every message will arrive. If ongoing maintenance is unlikely, less restrictive filtering with regular review may be safer. For account protections beyond junk controls, see Outlook email security.
Outlook Mobile Settings and Troubleshooting Junk That Still Gets Through
A suspicious message arrives while you're using Outlook on your phone. Open it, tap the three-dot More menu, then scroll to the reporting or blocking options. Labels vary by account and app version. Choose phishing reporting for suspected impersonation or credential theft; use sender blocking when you want that address filtered.
Reporting and blocking serve different purposes. Reporting phishing flags the message for review; it does not replace a Blocked Senders entry.
The app handles individual messages, but it doesn't provide full Safe Senders and Blocked Senders list editing or domain-rule management. For those controls, open Outlook in a browser and search Settings for Junk or Rules. Check for conflicting entries: an individually allowed address can override a blocked domain, as Microsoft explains in its blocked and allowed sender settings.
If legitimate mail appears in Junk on your phone, mark it as not junk, then check the same mailbox in the browser. This helps distinguish a delivery problem from an app display or synchronization issue without immediately widening your allowlist. If unwanted mail reaches the Inbox, confirm filtering is enabled. Changing sender addresses can defeat address-based blocks; broad domain blocks risk catching legitimate mail.
For work accounts, ask your administrator to check organizational filtering or quarantine when mailbox settings don't explain delivery. Mobile actions maintain the message-level layer; organizational filters and Microsoft detections remain separate.
For more practical steps, see stopping email spam. Gini Help offers an additional layer, screening calls, texts, and emails, including messages connected to Outlook accounts, for potential spam and scams. It is available on Google Play and the App Store. Review suspicious messages before acting.